Taking a Strategic Approach to Trade Show Planning
 Karin Roberts : Thu, May 01, 2025
By taking a strategic approach to every event, your bottom-line results from your trade show efforts are bound to get better.
.png)
Booth size feels like it should be one of the easier decisions in a trade show program. It isn't. Get it right, and everything downstream — layout, staffing, budget, even how visitors move through your space — falls into place. Get it wrong, and you spend the show fighting a floor plan that never quite works, whether that means squeezing too much into a cramped 10×10 or rattling around in a 20×30 that never fills up.
At The Tradeshow Network, booth size is usually the first real conversation we have with a client, well before graphics or furniture come up. Here's how we walk exhibitors through it — and what we've learned from building 10×20 and 20×20 rental programs for clients across the country.
Square footage is a means, not a goal. Before you settle on a number, get specific about what has to happen inside that footprint:
The answers usually point you toward one of a handful of common footprints: 10×10, 10×20, 20×20, 20×30, 30×30, and 30×40. Each one has a natural role on the show floor.
|
Booth Size |
Square Feet |
Typical Configuration |
Best Suited For |
|
10×10 |
100 |
Inline |
Focused messaging, compact teams, simple displays |
|
10×20 |
200 |
Inline |
Wider graphics wall, room for two functions side by side |
|
20×20 |
400 |
Island or peninsula |
Demos, meeting space, stronger visibility from every aisle |
|
20×30 |
600 |
Island |
Demo zones plus seating, storage, and staff separation |
|
30×30 |
900 |
Island |
Larger brand presence, hospitality, multiple product areas |
|
30×40 |
1,200 |
Large island |
Vehicles, equipment, product launches, multi-zone exhibits |
Most exhibitors cut their teeth in a 10×10 inline booth — one open aisle, neighbors on either side. It rewards restraint: a clean backwall, one counter, a monitor, light storage, and a two-person team. The most common misstep here is overfilling it. Extra furniture, too many samples, or too many staff on the floor make a 10×10 feel crowded before a visitor even steps in.
A 10×20 keeps the inline format but gives you enough width to run two things at once — a demo on one side, a lead-capture conversation on the other. The wider backwall also gives your graphics more room to read from the aisle. This is a natural step up when a 10×10 feels tight, but you're not ready for the cost or complexity of an island.
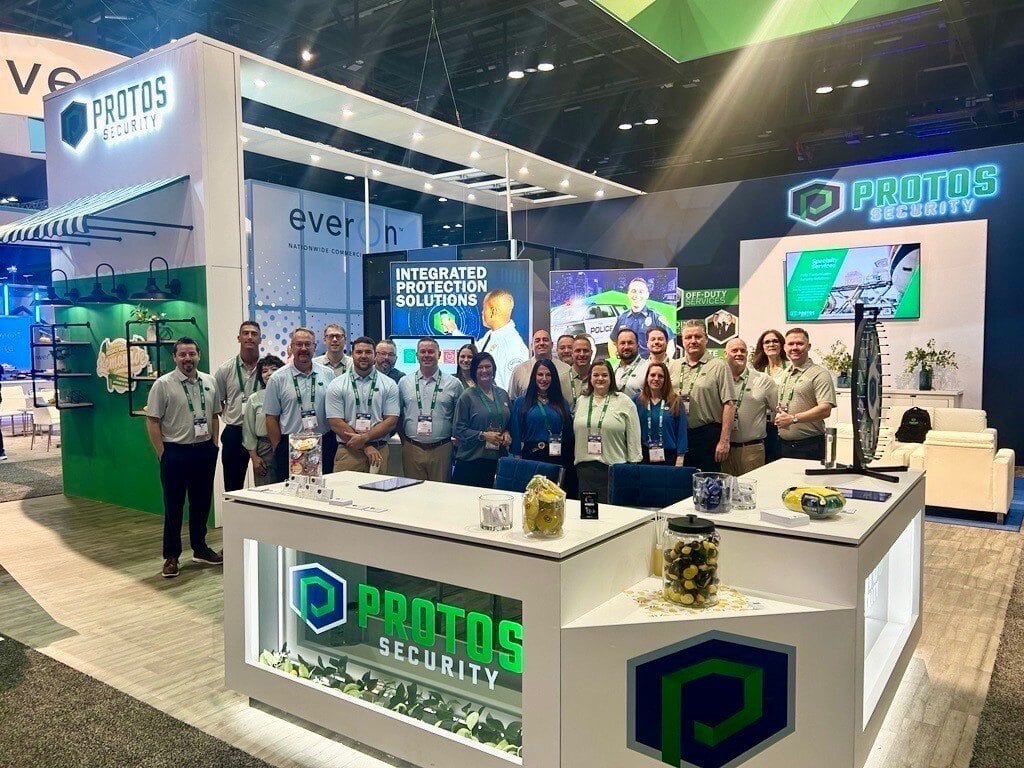
At 20×20, you're usually looking at an island or peninsula, and the booth starts to open up — real demo space, a small meeting area, better staff flow. This is one of the sizes we build most often, and it's also where the planning conversation gets more serious: how many sides are open, where visitors will enter, what height and rigging rules apply. A hanging sign becomes possible here, and it's one of the most effective tools for pulling traffic from across the hall.
Once you're at 20×30, you can genuinely separate zones — a demo area here, seating there, storage tucked out of view, staff working leads without crowding the aisle. This size is popular with rental programs because it offers real flexibility without becoming unmanageable. Go bigger still — 30×30 or 30×40 — and you're building a brand environment: hospitality space, multiple product stations, sometimes vehicles or large equipment. At this scale, electrical placement, freight, rigging, and installation timing all need to be locked down early, or the booth looks great on paper and falls apart on the show floor.
This trips up more exhibitors than almost anything else. Size is the footprint. Type is how that footprint sits on the floor and how many sides are open to traffic — inline, corner, end-cap, peninsula, or island. A 20×20 assigned as a peninsula needs a different layout than the same 20×20 as a full island. Always confirm your assigned configuration before design work gets too far along.
We sit down with exhibitors making this jump every year — teams who've outgrown their 10×10 or 10×20 and are ready for a 20×20 or larger island. The excitement is always the same: bigger footprint, hanging sign, 360-degree access, a real presence on the floor. What varies is how prepared each team is for what comes with it.
A few things worth knowing before you commit:
Budget for the whole program, not just the structure. A well-built island typically runs $250–$300 per square foot, so a 20×20 is a serious investment on its own. Add rigging for a hanging sign — often $6,000 to $14,000 or more depending on the city and venue — plus installation and dismantle labor, which can swing from under $8,000 to nearly $20,000 for the same footprint depending on the local labor market. Carpet, electricity, and freight all climb with your square footage too. None of this should be a surprise mid-project.
Your show schedule affects your booth strategy. Union labor rules and venue requirements vary significantly from city to city, even at identical square footage. If your calendar rotates through several markets, that belongs in your planning from day one. Some exhibitors deploy their island in lower-cost cities and run a well-branded inline in higher-cost union markets — there's no single right answer, just the one that fits your goals and total spend.
Placement and future growth deserve early attention. A prime corner or proximity to a high-traffic exhibitor can amplify any booth's impact, island or not — it's worth planning alongside the design itself. And if a bigger footprint is on your roadmap in a few years, it's worth building your current structure — modular systems especially — so it can grow into that future size instead of being replaced outright.
Choosing size by budget alone. A smaller booth costs less up front, but it can create real problems if your program actually needs demo space, storage, or several staff on the floor at once.
Going bigger without a plan. More square footage doesn't automatically mean better visitor flow. A large booth with no clear entry point or too many disconnected zones can leave visitors just as unsure where to go as a cramped one.
Skipping the venue's fine print. Every show has its own rules on backwall height, hanging signs, rigging, and electrical placement. Confirm them before your design is locked.
There isn't a universally “right” booth size — there's the right size for how your booth will actually be used. A 10×10 can carry a focused message perfectly well. A 20×20 or 20×30 gives you room for demos and real conversations. A 30×40 can handle vehicles, hospitality, and several working zones at once.
Before you settle on a footprint, run through your product display needs, staff count, expected traffic, storage requirements, venue rules, freight timing, and installation schedule. That's the exact conversation we have with every client at The Tradeshow Network, whether you're planning your first 10×10 or mapping out the move to your next island.
If you're weighing your next booth size — or wondering whether you've already outgrown your current one — we'd love to help you map it out.
 Karin Roberts : Thu, May 01, 2025
By taking a strategic approach to every event, your bottom-line results from your trade show efforts are bound to get better.
 Karin Roberts : Thu, Oct 17, 2024
Discover essential tips for finding and training the right trade show sales staff to ensure your booth's success and create meaningful connections...
 Karin Roberts : Tue, Oct 23, 2018
Mass globalization and the technology accelerating it have breathed new relevance into storytelling, enabling us to build bridges and form business...